solera awning manual
Solera Awning Manual: A Comprehensive Guide
This comprehensive guide details the installation, operation, and maintenance of your Solera awning, ensuring years of reliable use and enjoyment. It covers everything from initial setup to troubleshooting common issues, referencing Lippert’s instructions and providing clarity for RV owners.
Understanding Your Solera Awning
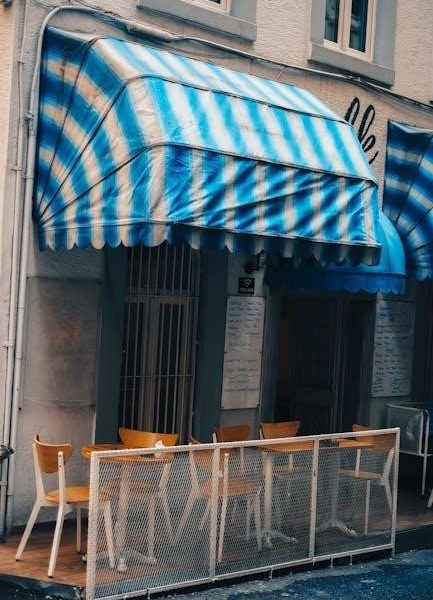
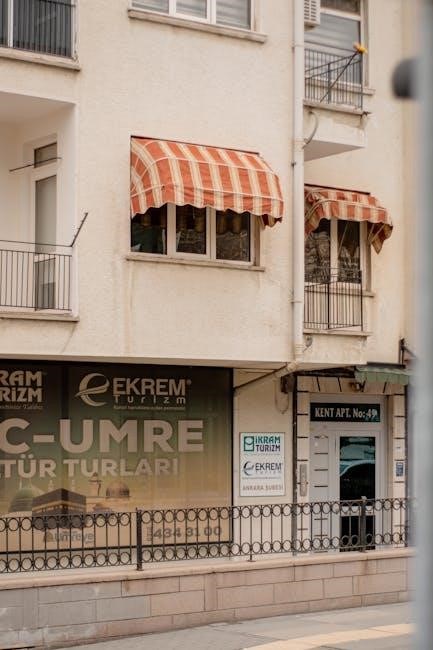
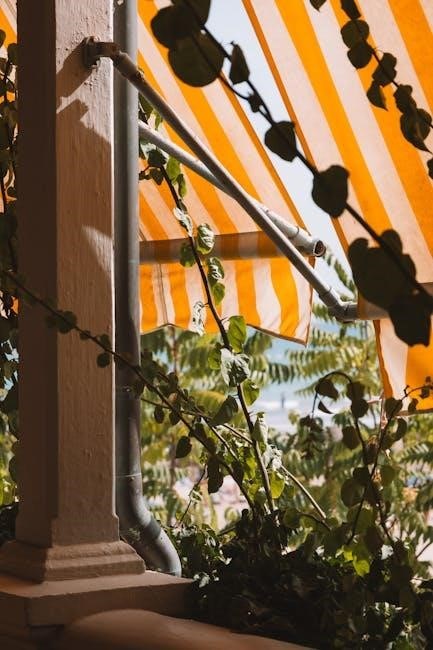
Solera awnings are designed to enhance your RV experience, providing shade, shelter, and a comfortable outdoor living space. These awnings come in both manual and power versions, offering varying levels of convenience. Understanding the core principles of your Solera awning is crucial for safe and effective operation.
Before beginning, carefully read all instructions, adhering to safety labels. This manual provides general guidance, but specific features may vary based on your model. Solera awnings utilize gas struts for assisted opening and closing, and proper function of these struts is vital. The awning assembly must be square on the unit prior to mounting, ensuring smooth operation and preventing stress on the components. Familiarize yourself with the awning’s dimensions and weight to ensure compatibility with your RV.
Solera Awning Models & Variations
Solera awnings are available in a range of models to suit diverse RV types and preferences. Key variations include manual and powered options, differing fabric materials, and various lengths to accommodate different RV sizes. The Solera 69 Tall Awning Top Inner Arm 50 is a specific example, utilizing a Lippert style 383152 gas strut for operation.
Power awnings offer push-button control, while manual awnings require physical extension and retraction. Fabric choices impact durability, water resistance, and aesthetic appeal. Understanding your specific model is essential for correct installation and maintenance. Compatibility with your RV is paramount; ensure the awning’s dimensions and weight are appropriate for your vehicle’s structure. Always refer to the specific documentation accompanying your awning for detailed model-specific information.
Key Components of a Solera Awning System
A Solera awning system comprises several crucial components working in harmony. These include the awning fabric, the roller assembly housing the fabric, and the supporting arms responsible for extension and retraction. Gas struts, like the Lippert 383152, provide assisted operation, easing the process of raising and lowering the awning.
The awning rail, if required, provides a secure mounting point to the RV. Internal components, often unseen, contribute to smooth functionality. Understanding each part’s role is vital for effective maintenance and troubleshooting. Proper assembly ensures stability and prevents damage. Regular inspection of these components, particularly the gas struts and fabric, is recommended for optimal performance and longevity of the entire system.
Installation Process
Carefully follow these steps for a secure and functional Solera awning installation. This process includes rail mounting (if needed), awning attachment, and fabric securing options for optimal performance.
Awning Rail Installation (If Needed)
Determining if awning rail installation is necessary depends on your RV’s existing structure. Many RVs are pre-equipped with suitable rails, eliminating this step. However, if rails are absent or incompatible, installing them is crucial for secure awning mounting.
Begin by carefully measuring and marking the desired rail locations, ensuring they are level and aligned with the RV’s roof. Utilize appropriate self-leveling sealant during the mounting process to prevent leaks and maintain a watertight seal. Secure the rails using self-tapping screws designed for RV construction, spacing them according to the rail manufacturer’s specifications.
Double-check the rail’s stability and alignment before proceeding. A properly installed rail provides a solid foundation for the awning assembly, contributing to its longevity and safe operation. Refer to the rail manufacturer’s instructions for detailed guidance and specific recommendations.
Awning Installation: Step-by-Step
Begin by carefully lifting the Solera awning assembly onto the RV roof, ensuring proper alignment with the installed rails (or existing mounting points); It’s highly recommended to have an assistant for this step due to the awning’s weight and size.
Secure the awning bracket to the rails using the provided hardware, tightening the bolts gradually in a crisscross pattern to ensure even pressure. Verify the awning is square to the RV body before fully tightening.
Next, connect the awning’s internal components, such as the gas struts and roller tube, following the detailed diagrams in the installation instructions. Double-check all connections for security and proper function. Finally, test the awning’s extension and retraction to confirm smooth operation.
Securing the Awning Fabric – Option 1
Option 1 for securing the Solera awning fabric involves utilizing the pre-installed pockets or sleeves along the fabric’s edge. These pockets are designed to slide over the awning’s roller tube and arms, creating a snug and secure fit.
Begin by fully extending the awning and carefully sliding the fabric into the designated pockets, starting at one end and working your way across. Ensure the fabric is evenly distributed and wrinkle-free within the pockets.
Once the fabric is fully inserted, retract the awning slightly to tension the material and confirm it remains securely in place. This method provides a clean and streamlined appearance, offering reliable protection from the elements.
Securing the Awning Fabric – Option 2
Option 2 for securing the Solera awning fabric utilizes specialized clips or fasteners designed to grip the fabric and awning arms. This method is particularly useful for awnings without integrated pockets or when additional security is desired.
Begin by extending the awning to the desired position. Then, evenly space the clips along the fabric’s edge, attaching them firmly to both the fabric and the awning arms. Ensure each clip is securely fastened to prevent slippage during operation.
This method allows for adjustable tension and easy removal for cleaning or replacement. Regularly inspect the clips for wear and tear, replacing them as needed to maintain a secure and reliable awning system.

Operation & Usage
Proper operation involves extending and retracting the awning, understanding angle adjustments, and always prioritizing safety during use. Familiarize yourself with these essential guidelines.
Manual Awning Operation: Extending & Retracting
Extending your Solera manual awning is a straightforward process, typically involving a pull strap or tube located near the awning’s roller. Gently pull the strap outward to release the locking mechanism and extend the awning to your desired length. Avoid forcing the awning, as this could damage the internal components.
To retract the awning, repeat the process, pulling the strap in the opposite direction. It’s crucial to ensure there are no obstructions – people, objects, or debris – in the awning’s path during both extension and retraction. A slight upward tilt during retraction can help shed any accumulated water or snow, preventing strain on the system. Always fully secure the awning when not in use, especially in windy conditions, to prevent accidental deployment or damage. Remember to check for proper locking after each operation.
Understanding Awning Angles & Adjustment
Solera awnings offer adjustable angles to maximize shade and optimize water runoff. The angle is typically controlled by adjustable support arms located at the awning’s ends. These arms often feature locking mechanisms to secure the desired position. Raising the awning angle allows for better water drainage during light rain, preventing pooling and potential damage.
Lowering the angle provides increased shade coverage, ideal for sunny conditions. Experiment with different angles to find the optimal setting for your specific needs and environment. Ensure both support arms are adjusted to the same angle to maintain a level awning. Regularly inspect the locking mechanisms to ensure they are functioning correctly, preventing unexpected adjustments due to wind or movement. Proper angle adjustment extends awning life.
Safety Precautions During Operation
Always prioritize safety when operating your Solera awning. Never operate the awning in excessively windy conditions, as this can cause damage to the awning itself or surrounding structures. Ensure the area around the awning is clear of people and objects before extending or retracting it. Avoid standing directly under the awning during operation.
Regularly inspect the awning for any signs of wear and tear, such as frayed fabric or damaged support arms. Do not attempt to repair the awning yourself if you are not comfortable doing so; consult a qualified technician. Be mindful of overhead obstructions, like trees or power lines, before extending the awning. Never leave the awning unattended during operation, and always follow the manufacturer’s instructions.
Maintenance & Troubleshooting
Regular maintenance extends your Solera awning’s life. Addressing operational issues promptly, like gas strut failures or fabric tears, ensures continued performance and prevents further damage.
Regular Cleaning & Fabric Care
Maintaining your Solera awning fabric is crucial for longevity and appearance. Regular cleaning prevents the build-up of dirt, mildew, and other contaminants that can degrade the material over time. Use a mild soap and water solution, applying it with a soft brush or sponge. Avoid harsh chemicals, abrasive cleaners, or pressure washers, as these can damage the fabric’s coating and compromise its waterproof properties.
Rinse thoroughly with clean water and allow the awning to air dry completely before retracting it. Periodic fabric protectant treatments can enhance water repellency and UV resistance, further extending the awning’s lifespan. Inspect the fabric regularly for any signs of damage, such as tears, holes, or fraying, and address them promptly to prevent them from worsening. Proper fabric care ensures your Solera awning remains a functional and attractive addition to your RV for years to come.
Gas Strut Replacement & Adjustment
The gas struts are vital for smooth awning operation, assisting with extension and retraction. Over time, these struts can lose pressure, making the awning difficult to manage. Replacement is straightforward; ensure you obtain the correct strut – often a Lippert style 383152 for Solera 69 Tall awnings – and follow the manufacturer’s instructions carefully. Disconnect the old strut, noting its orientation, and securely attach the new one.
Adjustment may be necessary after replacement to achieve optimal performance. Some models allow for tension adjustment, enabling you to fine-tune the awning’s ease of use. If the awning is too difficult to open or close, or doesn’t stay in position, adjust the strut tension accordingly. Always prioritize safety during this process, and consult the full manual for detailed guidance and specific strut specifications.
Addressing Common Operational Issues
Several issues can arise during Solera awning operation, but many are easily resolved. If the awning struggles to extend or retract, first check for obstructions along the awning rail. Ensure the mounting is secure and square, as misalignment can cause binding. Difficulty often stems from weakened gas struts, requiring replacement as detailed in the manual.
Fabric bunching or uneven extension indicates potential arm assembly problems; inspect for loose bolts or damaged components. If the awning won’t stay in a desired position, adjust the strut tension or examine the locking mechanisms. Always refer to the complete installation instructions for detailed troubleshooting steps and safety precautions. Remember to disconnect power before attempting any repairs.

Solera Awning Accessories
Enhance your Solera awning with optional accessories like LED lights, family rooms, and screen rooms, expanding functionality and comfort for your RV adventures.
Solera Serenity LED Light Installation
The Solera Serenity LED Light Kit significantly enhances visibility and ambiance around your awning. Installation typically involves carefully routing the LED strip along the awning’s fabric edge, securing it with the provided adhesive backing. Ensure the awning is fully retracted before beginning.
Connect the wiring harness to the designated power source, often a 12V DC connection within your RV’s electrical system. Pay close attention to polarity to avoid damaging the lights. The kit usually includes a switch for convenient on/off control.
Important considerations include: protecting the wiring from weather exposure, verifying a secure connection to prevent shorts, and testing the lights thoroughly after installation. Refer to the specific kit’s instructions for detailed guidance and safety precautions. Proper installation ensures a bright, energy-efficient, and enjoyable lighting experience.
Family Room & Screen Room Installation
Transform your Solera awning into a fully enclosed living space with a Family Room or Screen Room. Installation begins by securely attaching the room’s side panels to the awning’s existing structure, utilizing durable zippers and Velcro straps. Ensure the awning is fully extended and properly positioned before attaching the room.
Next, connect the bottom of the room to the RV’s exterior, often using stake loops and ground stakes for stability. Proper tensioning is crucial to prevent sagging and ensure a weatherproof seal.
Key considerations include: selecting the correct room size for your awning, verifying compatibility with your RV model, and following the manufacturer’s instructions meticulously. Regularly inspect the connections and stakes for tightness, especially during inclement weather. Enjoy expanded living space and protection from the elements!
Awning Rail Covers & Weather Protection
Protect your Solera awning’s rails and enhance its longevity with dedicated rail covers. These covers shield the rails from harsh UV rays, dirt, debris, and the damaging effects of prolonged exposure to the elements. Installation typically involves sliding the covers onto the rails, ensuring a snug and secure fit.
Beyond rail covers, consider utilizing awning protectants and conditioners to maintain the fabric’s integrity. Regularly cleaning the awning fabric and applying a protective coating can prevent mildew, fading, and cracking.
Proper weather protection also includes: fully retracting the awning during strong winds or severe storms, and ensuring adequate drainage to prevent water pooling. Inspect the awning regularly for any signs of wear or damage, addressing issues promptly to avoid costly repairs.

Technical Specifications
Detailed specifications, including dimensions, weight, and compatible RV types, are crucial for proper installation and operation of your Solera awning system.
Solera Awning Dimensions & Weight
Understanding the precise dimensions and weight of your Solera awning is paramount for safe and effective installation, as well as ensuring compatibility with your recreational vehicle. Solera awnings are available in a variety of lengths, typically ranging from 8 feet to 21 feet, to accommodate diverse RV sizes.
The weight of the awning will vary depending on the length and model, but generally falls between 40 and 80 pounds. Accurate weight assessment is vital for proper mounting and to avoid exceeding your RV’s weight capacity.
Furthermore, the extended projection, or drop, of the awning—often around 69 inches for “Tall” models—impacts wind resistance and shade coverage. Refer to your specific model’s documentation for exact measurements, as variations exist. Always consult the manufacturer’s specifications before proceeding with installation to guarantee a secure and functional setup.
Compatible RV Types & Sizes
Solera awnings demonstrate broad compatibility, fitting a wide spectrum of recreational vehicle types, including travel trailers, fifth wheels, and Class C motorhomes. However, confirming compatibility with your specific RV is crucial before purchase and installation. Generally, Solera awnings are designed for RVs with a roof radius between 90 and 130 degrees.
RV lengths typically suited for Solera awnings range from approximately 15 feet to 40 feet, though this depends on the chosen awning length.
Ensure your RV’s roof structure can adequately support the awning’s weight, and that sufficient mounting space is available. Some RVs may require an awning rail installation, while others are pre-equipped. Always verify the awning’s specifications against your RV’s manufacturer guidelines for a secure and reliable fit.
Gas Strut Specifications (e.g., 383152)
Solera awning gas struts are vital components for smooth extension and retraction, providing assisted lifting and controlled lowering of the awning fabric. A common replacement part number is 383152, specifically for the Solera 69 Tall Awning Top Inner Arm 50. These struts are universal for both power and manual Solera awning models.
Gas struts utilize compressed nitrogen gas to generate force. Their specifications, including length, stroke, and force rating, are critical for proper function. Replacement struts should match the original specifications to maintain awning operation.
Ensure the strut’s end fittings are compatible with your awning arm assembly. Incorrect installation or mismatched specifications can lead to operational issues or damage. Regularly inspect struts for leaks or signs of wear, replacing them as needed to ensure safe and reliable awning use.

Warranty Information
Lippert provides a warranty for Solera awnings, covering defects in materials and workmanship. Review the specific warranty details and claim procedures for comprehensive coverage information.
Lippert Solera Awning Warranty Details
Lippert’s Solera awning warranty offers protection against manufacturing defects for a specified period, typically one year from the original purchase date. This warranty covers issues like fabric tearing due to faulty stitching, component failures within the awning’s mechanism, and defects in the awning’s frame. However, it’s crucial to understand what isn’t covered;
Damage resulting from misuse, abuse, improper installation (not following provided instructions), normal wear and tear, accidents, or acts of nature are generally excluded. Modifications to the awning or use of non-approved replacement parts will also void the warranty. Maintaining proof of purchase, such as a receipt or invoice, is essential for any warranty claim.
The warranty is non-transferable and applies only to the original purchaser. Lippert reserves the right to inspect any claimed defect before authorizing repair or replacement. Warranty claims must be submitted through an authorized Lippert dealer or directly to Lippert customer support, providing detailed information about the issue and proof of purchase.

Claim Procedures & Contact Information
To initiate a warranty claim for your Solera awning, first gather your original proof of purchase (receipt or invoice) and document the defect with clear photos or videos. Contact an authorized Lippert dealer; they can often assist with the claim process and initial inspection. If a dealer isn’t accessible, contact Lippert directly.
Submit your claim through the Lippert support website or by calling their customer service line. Be prepared to provide your awning model number, date of purchase, a detailed description of the issue, and the supporting documentation. Lippert will review your claim and may request additional information or require you to ship the defective component for inspection.
Lippert Customer Support: 1-800-343-6694. Website: support.lci1.com. Allow several business days for claim processing. Approved claims will typically result in repair, replacement, or a refund, at Lippert’s discretion. Keep all communication records related to your claim.
Leave a Reply
You must be logged in to post a comment.